How to Put Chains on a Tractor: A Step-by-Step Guide
Getting your tractor stuck in mud, snow, or ice is frustrating. Tire chains dramatically improve traction, reducing fuel consumption and preventing costly delays. This guide provides clear, step-by-step instructions for safely installing and removing tractor tire chains, maximizing their effectiveness and lifespan. For more tractor tools, check out this helpful resource.
Safety First: Essential Precautions
Before you begin, prioritize safety. This isn't a casual task; we're working with heavy machinery. Always wear sturdy work boots, heavy-duty gloves, and safety glasses. Securely chock the wheels opposite the one you're working on to prevent accidental movement. If jacking up the tractor, use jack stands—never rely solely on a jack for support. Remember, a moment's carelessness can lead to serious injury. Is your safety gear ready?
Tools and Materials Checklist
Gather these essential items before you start:
- Tractor Tire Chains: Select chains appropriate for your tractor's tire size and the terrain conditions (light, medium, or heavy-duty). A farm supply store associate can advise on the best type.
- Jack: A jack capable of lifting your tractor's tires. Ensure it's in good working order.
- Wheel Chocks: Essential for safety; never skip this step.
- Gloves: Protect your hands.
- Wrench or Ratchet: For tightening the chains.
- Optional: Helper: An extra pair of hands can make installation easier.
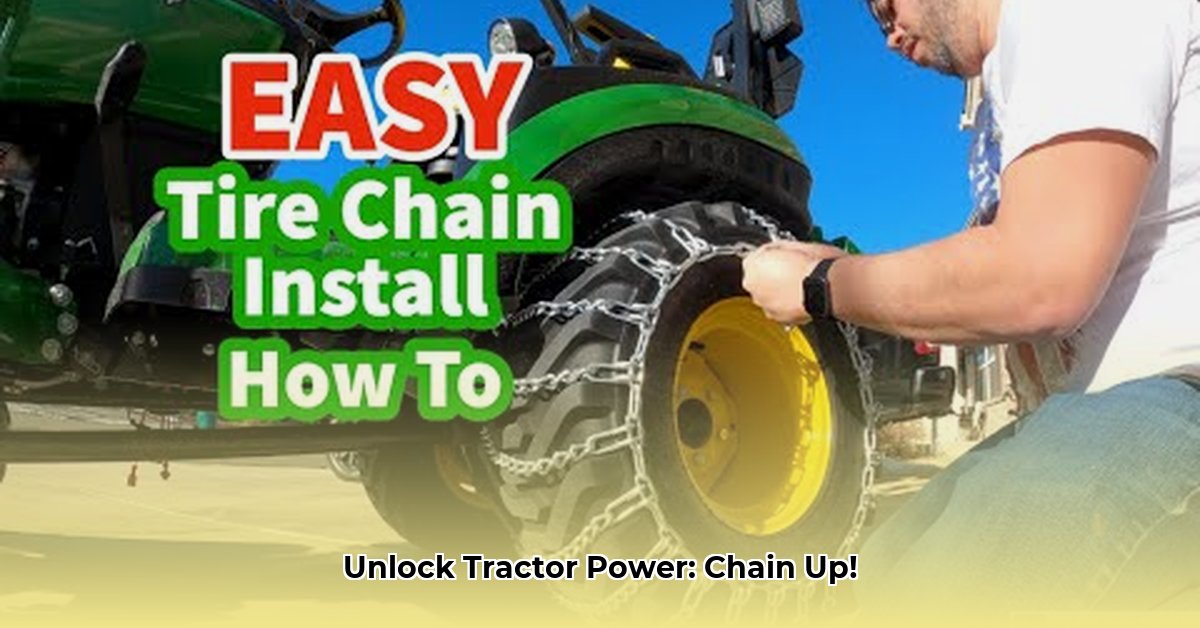
Step-by-Step Chain Installation
Follow these steps carefully:
Preparation: Engage the parking brake and securely chock the wheels opposite the one you are working on. This prevents the tractor from rolling.
Lifting the Wheel: Carefully jack up the tire until it's clear of the ground. Use jack stands immediately.
Chain Positioning: Drape the chains over the tire, ensuring the hooks face the inside. Align the chains evenly around the tire's circumference.
Connecting the Chains: Connect the side chains, ensuring the hooks and clips are securely fastened. Then, attach the cross chains, creating a strong, supportive network.
Tightening: Once all chain sections are connected, carefully lower the wheel to the ground. Use a wrench or ratchet to tighten the chains—they should be snug but not overly taut.
Testing: Move the tractor a short distance to check for proper chain tension and alignment. Adjust as needed.
Chain Removal: A Safe Procedure
Removing chains is the reverse of installation:
- Lifting the Wheel: Carefully jack up the wheel and secure it with jack stands.
- Detaching Chains: Unhook the chains section by section, ensuring each connection is securely released.
- Storing Chains: Clean the chains of mud and debris. Store them in a dry, cool location to prevent rust and damage.
Maintenance and Storage: Extending Chain Lifespan
Proper maintenance extends the life of your chains, minimizing waste and saving you money. After each use, clean off mud and debris. Store them in a dry, cool location to prevent rust. Regular inspection for wear and tear is crucial.
Troubleshooting Common Issues
- Chains Slipping: Re-tighten the chains. If slipping persists, check for worn or damaged links and reposition as needed. Replace if necessary.
- Broken Chain Links: Replace the damaged chain immediately. Never use a damaged chain.
- Difficulty Installing: Verify that your chains are the correct size and type for your tractor tires.
Mastering the art of installing and removing tractor tire chains is crucial for safe and efficient operation. Remember safety first, and always follow the manufacturer’s instructions for your specific chains and tractor model. By following these steps, you'll ensure optimal traction and extend the lifespan of your equipment.